DIY Hand-Stamped Fabric and a Dress

spring8-page-0bunny2-page-0

Lately, I have seen some really cool hand-stamped fabric projects on Pinterest. I wanted to try it for myself and give it my own spin, and use the fabric to make a dress. I decided on a shape, and found some cheap fabric. This project had a total cost of $6.00. Here’s how I made it:

Image

Image

Image

Image

Time: 1 hour 30 minutes to cut out stamp and print onto fabric. 3 hours to make dress.

Money: $6.00 for fabric, paint and foam board. $10 for dress pattern. All other supplies I had on hand, including pattern. 

Ick Factor: Medium

Love it or Leave it: I personally love it. This project is a little more time intensive. It’s very easy to stamp the fabric, you could use it for a tote, table cloth, etc. (Basically anything made out of fabric). It’s fun to be able to design your own fabric and make your project even more your own. 

Posted by Sara J.

A Clean Home is a Happy Home

As a new mom, I have found it difficult and overwhelming at times to keep my house clean and picked up. Let’s be honest, my house truly gets cleaned right before someone is about to come over! Yikes. So I decided to try a cleaning schedule. Everyday of the week I have different chores, and maybe spend an hour or two tops completing them. The idea is to have a clean house by Friday-Saturday, and to have successfully reached every corner of the house without feeling stressed. This has been a life saver for me. I love this idea, and feel like my time is more balanced throughout my week. I designed a cleaning schedule you can download and print off for yourself. I left empty spots under each day so you can add anything else you might need to have done in your home. I would suggest putting this printable into a plastic sheet protector, and check off each chore with a dry erase marker. I always feel more fulfilled when I can check something off the list!!

Image

You can download this free printable HERE.

There are all kinds of cleaning schedules out there, but this one is designed for me and what fits best in my life. Go ahead, give it a try!

Posted by Sara J

Seven Secrets to Crispy Tofu

tofu-page-0

One of my goals for 2014 is to experiment with new food without killing my waistline.  I found Tofu in bulk at a great price at Costco and decided to give it a try. With less than 94 calories and zero fat per 1/2 cup, tofu was the perfect answer! Although, I’ve cooked with tofu many times, I’ve never enjoyed the slippery texture.  Even after cooking it in a stir fry, it can still taste uncooked and flavorless.  So, this week I tried making tofu edible by adding flavor and crunch! Here are seven easy tips (four for fried tofu and three for baked tofu) I learned that will keep you asking for more without crashing your diet!  Plus, a delicious chopped salad recipe to eat with your tofu.

Image

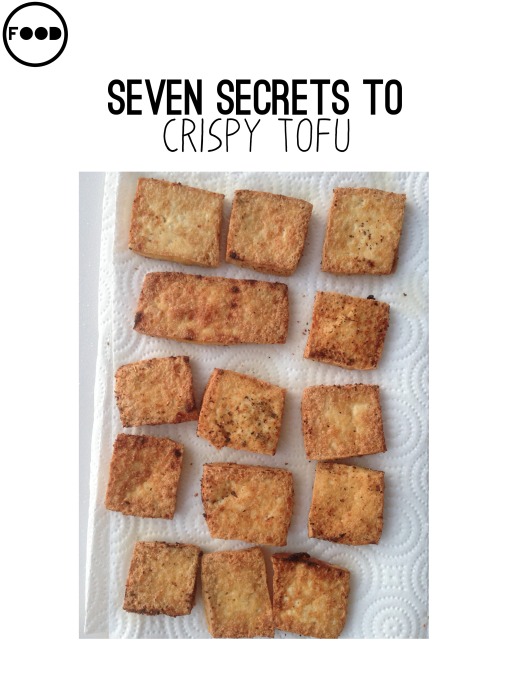
4 Secrets for Crispy Tofu:

1. Cut 12 oz. of extra firm tofu into 1/2 patties

2. Season with salt and pepper or the seasoning of your choice

3. Cook in heated oil for 3 minutes per side

4. Cool on a bed of four paper towels

Image

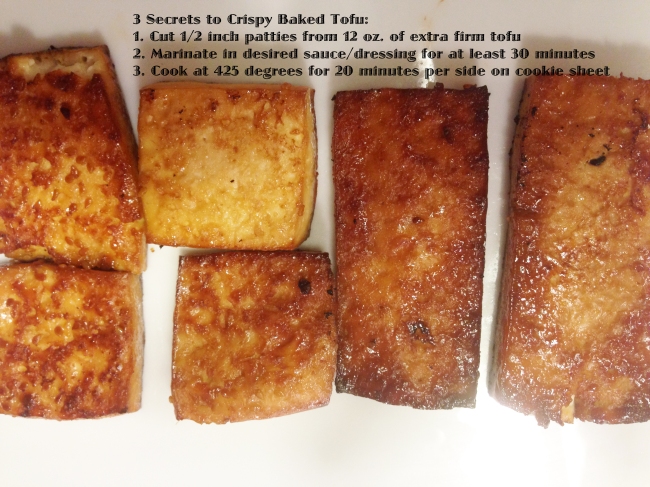
3 Secrets to Crispy Baked Tofu:

1. Cut in 1/2 inch patties from 12 oz. of extra firm tofu

2. Marinate in desired sauce/dressing for at least 30 minutes

3. Cook at 425 degrees for 20 minutes per side on a cookie sheet (cover sheet with tin foil for less mess)

Both the baked and fried tofu was delicious!  However, I liked the fried tofu best. It was a better crunch!

Use these for salads or as snacks to dip in barbecue sauce or other dressings.

Image

Image

Asian Chopped Tofu Salad

Serves 6

1 whole zucchini, chopped

2 pickled or canned beets, chopped

2 cups  frozen shelled edamame steamed

1 head Romaine lettuce, chopped

12 oz. extra firm tofu

1 cup Canola oil

salt and pepper

2 cups cooked bow tie pasta

1 cup (plus more to taste) Soy Vay Very Very Teriyaki sauce (found at Trader Joe’s and other grocer’s)

Directions:

Tofu:

Heat Canola oil in a wok or skillet.  Cut tofu into ½ inch patties and season with salt and pepper on one side.  When oil is heated, place tofu in oil, seasoned side down.  Cook for 3 minutes per side or until golden brown.  Remove and cool on a prepared plate with four paper towels.

Pasta:

Cook pasta according to package directions.  Rinse and place in a separate bowl. Pour Soy Vay’s Very Very Teriyaki sauce on noodles and marinate about 5 minutes.  (Time saving tip: toss the frozen edamame into the pasta pot during the last 2 minutes of cooking, drain together)

Salad:

While tofu and pasta are cooking, chop zucchini, beets, and lettuce.  When tofu is cool, chop and add to separate bowl.  Mix all ingredients together in a large salad bowl.  Add more teriyaki sauce to taste. Serve and enjoy!

Crispy Tofu:

Cost for Tofu: $12 for a four pack at Costco

Time: 1 hour

Love it or leave it? Love it!  Adding flavor and texture to the tofu gave it the right taste to keep coming back for more.  Even the fried tofu is still a lower fat option over high fat and high calorie meats. I will definitely do this again.

Ick Factor: Medium. A little bit time consuming to cook the tofu but definitely worth the wait. In the future, I will double the recipe for leftovers.

My Favorite Comfort Food

Image

This is my FAVORITE comfort food. While growing up, I remember my mom making this for me on those cold wintery California days… so what if it was only 60 degrees outside. Now that I am in Utah I love it even more. I also like to make this when anyone in my family comes down with a cold. Not only is this dish yummy, it’s good for you! This isn’t your average chili. I should let you know I am not a big fan of chili in general, but this one is worth it. Sooo delish.

Image

Here is how I made it:

1. In a large stockpot over medium heat, add the turkey and begin to brown it. After a few minutes add in the chopped onion.

2. Once the turkey is cooked through and the onions translucent, add in the chopped green bell pepper. Let it cook with the turkey and onion for a few minutes, and then add the rest of the ingredients to the pot. Give it a good stir.

3.  Bring the chili to a boil and simmer for 30 minutes with the lid on. Add salt and pepper to taste.

4. Scoop a good amount of chili into a bowl, top with a generous scoop of sour cream, cheddar cheese, lime wedge, cilantro and Fritos. Enjoy!! I know you will.

Time: About one hour in total. 

Money: $15.00 (Serves 6, $2.50 per serving) Makes for great leftovers too. 

Ick Factor: Low.

Love it or leave it?: Love it. This is my favorite dish to make on a cold day. This isn’t your average chili, it’s better described as a yummy vegetable, bean and turkey soup. The flavors are spot on (with added toppings), and it’s super quick and easy to make. Enjoy!

Posted by Sara J.

DIY Burp Cloth Tutorial

Image

These are my go to baby gifts. They are awesome. I also made some for myself and I used them with every feeding from 0-6 months. They are so absorbent, and keep mama and baby clean. I love these!! Here is a simple step by step tutorial so you can make them too. Enjoy!

ImageThese are the ones you can find at Babies R Us, I found these in store. If you can find 6-ply, they hold up even better.

IMG_3925

Image

Image

Here are just a few of some burp cloths I have made in the past. Seriously guys, these are the best.

burp6-page-0

Time: About one hour to make 5. Once you get the hang of it things will go faster.

Money: $12.99-$15.99 for ten burp cloths. $10- $15 for a few fat quarters of fabric. 

Ick Factor: Low. 

Love it or Leave it: Love it. Again, these are so easy, and who doesn’t love a home made gift? I love how creative you can get with these, you can even make a matching quilt or blanket to go with them. Best baby gift, and best baby gear. These were a staple item for my babe everyday until she reached about 6 months. Enjoy! 

Posted by Sara J

Making Sense of Sand

sand-page-0 (1)

I recently discovered Kinetic Sand at a toy store.  It’s pretty amazing the way it can mold, shape, and entertain without a mess (it’s sand afterall).  However, this sand is roughly $15 for two pounds and I was curious if I could find a less expensive alternative.  Since there are many homemade play dough and homemade sand recipes, I decided to test how these compare to the durability of Kinetic Sand.

Here’s what I discovered:

Image

Image

Overall, I feel Kinetic Sand still wins.  The homemade alternatives passed the kid test by keeping my toddler entertained for over thirty minutes uninterrupted. However, the mess for both Moon Sand recipes, was not worth it.  Since I had to buy all the ingredients, I only saved about $3 total.

Image

Homemade Sand Recipes: 

Time: about 15 minutes to put together after purchasing ingredients

Cost: low

Ick factor: high

Love it or Leave it: Leave it!  Spend the $15 and get the good clean Kinetic Sand!

Posted by Sara W.

The Statement Necklace

statementneck-page-0

Over the last 8 years I’ve been pregnant for 45 months and nursed for 5+ years. Clothes have not always been kind to my changing body, but the statement necklace has always been my friend. Here are some of my favorite places to find statement necklaces and CHEAP! Keyword: Cheap. I’ll be honest with you, I crave those J.Crew necklaces… until I see the price tag. Have you ever heard of J.Crew Factory ?? They are discounted J.Crew necklaces for a fraction of the cost. (The necklace posted above is straight from this website). Here is my list of my go to statement necklace sites:

1. J.Crew Factory

2. Forever 21

3. Brickyard Buffalo

4. Nordstrom BP

5. Target

Here is what I have to say about each place. 1. J.Crew Factory- great quality and great price. I suggest shopping online instead of in store. 2. Forever 21- cheap cheap cheap, anyone can afford one of these babies, endless selection online. 3. Brickyard Buffalo- I suggest following their instagram account. This is an online pop-up market that showcases individual companies and their freshest items at a discounted price. They don’t always have necklaces but when they do- you’re going to want them. 4. Nordstrom BP- I suggest shopping in store on this one. Great prices and great quality. I’m still wearing one I bought three years ago, and I still love it. 5. Target. Target has my heart. Enough said. I suggest shopping both online and instore. Depending on where you live and how popular your target is, it may be picked over.

stateneck-page-0

Thank you big necklaces for making me feel pretty.

Time: 3 min to pick one from my closet. An hour to shop for a new one.

Cost: Prices Vary. $12-$50 from above featured stores.

Ick: Low. Lots of fun options, easy way to jazz up any old outfit. 

Love it or Leave it?: LOVE IT!  Statement necklaces pair with many outfits and help glam up your day.

Posted by Lindsay M. and Sara J.

Valentine You’re Plane Cool

PINTEST MAIN JPEG

Plane Cool Valentine

My sons are still little, but I couldn’t resist making some valentines for them to deliver to friends and family. Here is a cute printable I made for them. You can attach it to a small candy treat or a toy plane (for a no sugar option).

Hope you are all having a happy Valentine’s week!

Plane Cool Valentine

Posted by Jessica J.

Salt Dough Heart Print

Image

Image

This is our first Valentine’s Day with a baby, and I wanted to do something more sentimental for my husband. My daughter is nearly 6 months old, and loves to feel with her feet. This project was perfect for both of us. She happily watched me in her high chair while I mixed and rolled the dough. She loved wiggling her toes into the soft dough when it was her turn to stamp her feet. This recipe is very simple, here is how I made it:

What you need:

1 cup of flour

1/2 cup of salt

1/2 cup of water

Blend together flour and salt. Stir in water as dough forms. Knead on a floured surface until dough is workable. Roll out the dough with a rolling pin until it’s about 1/4 inch thick. Allow to air dry or put it in a warm oven. Once the dough is dry, I painted it using two colors. The feet prints were kind of hard to see if I were to paint it all one color. I probably would have used different colors but I wanted to use only what I had on hand. You can add a ribbon or string by threading it through the hole at the top and hang it as a cute ornament around your house.

Money: Free, I had all supplies on hand

Time: 40 minutes to mix dough, stamp feet, cut, write, paint. 3 days to air dry.

Ick factor: Medium. I didn’t like how long it took for the dough to dry. I would try putting it in a warm oven next time. I also had a hard time writing in the dough. I used a pencil. I might try a different recipe next time. 

Worth it? Yes. This was a fast project I could do along with my 6 month old. It was completely free, and serves as a precious keepsake for Valentine’s Days to come, and it’s the perfect gift for my husband this year. Enjoy!

Posted by Sara J. 

Getting Organized: Toys

toyorg-page-0

This week I tested which boxes work best for toy organization.  I came to find out I was also testing how to create at least thirty minutes of uninterrupted playtime!

beforeafter-page-0

Here’s what I learned:

  • Walmart has the best prices for storage bins
  • Clear boxes help children see what’s inside without tearing all the boxes open
  • Sterilite boxes are best because they have clasps that easily hold shut and do not open when picked up
  • Stackable boxes are ideal
  • A mix of large and small boxes are necessary
  • Organized toys are actually “useable”  because children can see them
  • Organized toys are easily cleaned up because there is a space for them

Image

Image

Make sure to sort similar toys together. This seems obvious, but even separating different types of toys (for example: plastic cars separate from matchbox cars above) can be helpful to keep things organized.

Image

Large and irregular sized toys are tricky because they don’t fit neatly in a box.  However, these are often the culprits for being strewn about my house.  I put these toys in a large black toy bin purchased from Lowe’s.

Image

Time: 1 hour to buy boxes

3 hours to sort and organize (2 days if children are present)

Cost: approximately $40

Ick Factor: High (time intensive)

Worth it: Yes!  This project demands a lot of time but yields high return with peace of mind.  It’s the kind of thing you put off doing (forever, in my case) and then when you finally tackle it, you feel like a million bucks!

Posted by: Sara W.

Follow on WordPress.com